Book Contents

Book Index

Configuring Windows File Sharing

When Windows Files Sharing is configured, users can view network shares as described in Viewing Network Shares Using Windows File Sharing.

To configure Windows file sharing

  1. In the Configuration tab's navigation pane, click Share > Windows File Sharing.

    The Share > Windows File Sharing page appears.
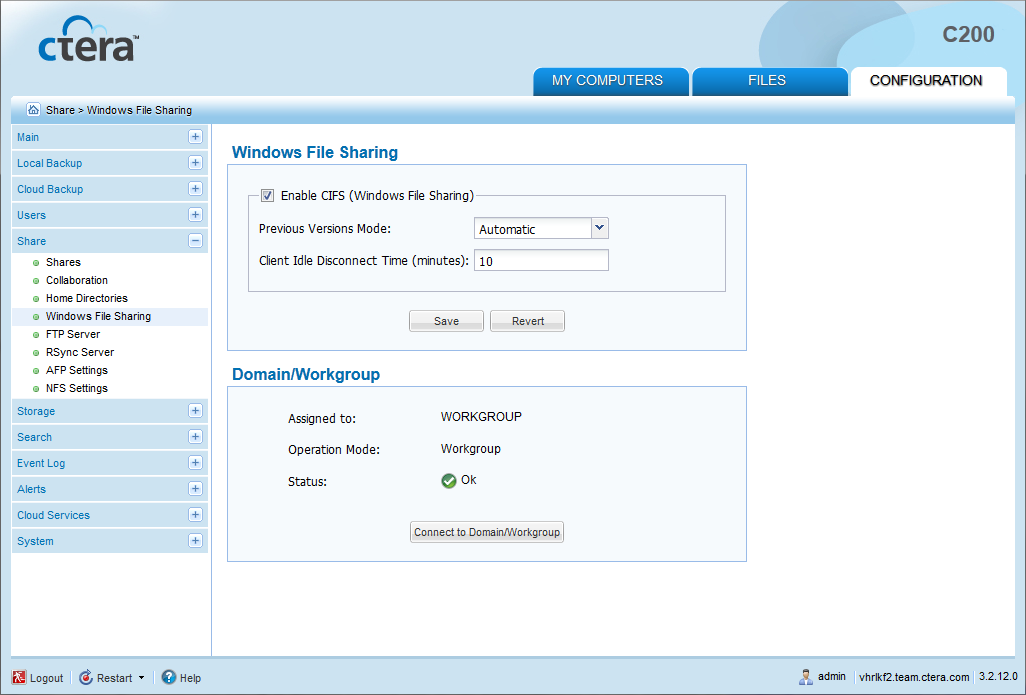
    Linked Picture File

  2. Complete the fields using the following table.
  3. Click Save.
  4. (Optional) Do one of the following:

In this field...

Do this...

Enable CIFS (Windows File Sharing)

Select this option to enable Windows file sharing.

Previous Versions Mode

Select the type of snapshots that should be exposed through the "Previous Versions" interface:

  • Automatic. For volumes that are NEXT3 snapshot enabled, display NEXT3 snapshots for all shares. For volumes that are not NEXT3 snapshot enabled, display cloud snapshots for all shares.
  • Local Snapshots. NEXT3 snapshots, which are stored locally on a NEXT3-snapshot-enabled volume
  • Cloud Snapshots. Cloud snapshots, which are stored online using CTERA’s Cloud Backup service

The default value is Automatic.

For more information on snapshots, see Working with Volume Snapshots.

Client Idle Disconnect Time

Type the amount of time in minutes after which a client should be disconnected, if the connection is idle.

This is an advanced setting, and there is usually no need to change it.

The default value is 10 minutes.

In This Section

Configuring Windows File Sharing for a Workgroup

Configuring Windows File Sharing for an Individual Active Directory Domain

Configuring Windows File Sharing for an Active Directory Tree or Forest

Granting Administrative Permissions to Active Directory Users/Groups

See Also

Configuring FTP Access

Configuring RSync Access

Configuring Apple File Sharing

Configuring NFS Access