Book Contents

Book Index

Selecting Files and Folders for File-Level Backup

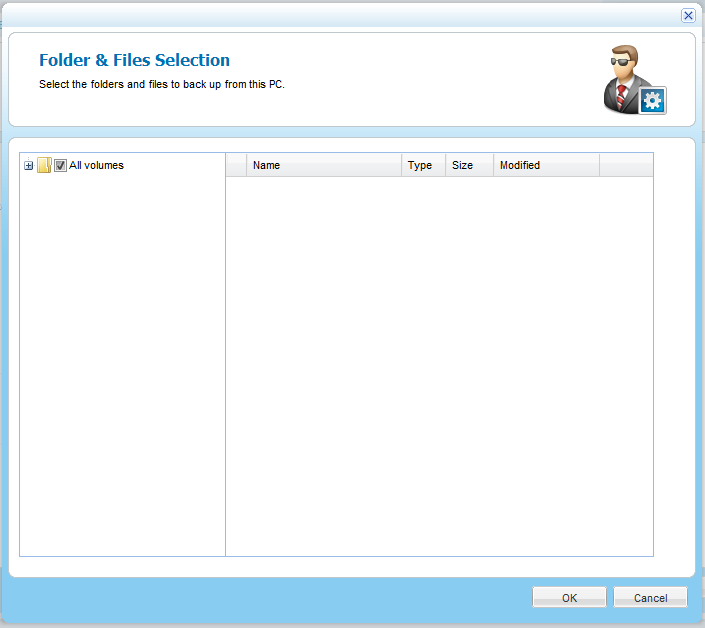
You can select files and folder for file-level backup for individual CTERA Agents.


Tip

Info Icon

If the Allow user to configure the agent check box is selected in the global settings for all CTERA Agents, files and folders for file-level backup can be selected in the CTERA Agent local interface. See Configuring Global Settings for All CTERA Agents and Configuring the Agent.

To select files and folders for file-level backup

  1. Open the CTERA Agent Manager.

    See Opening the CTERA Agent Manager.

  2. Click the File-level Backup tab.

    The File-level Backup tab appears.

  3. In the Files to Back Up field, click Icon-Elipsis.png.

    The Folder & Files Selection window opens.

    Linked Picture File

  4. Expand the tree nodes and select the check boxes next to the folders and files you want to back up.
  5. Click OK.
  6. Click Save.

    At the bottom of the workspace, the Destination field indicates the folder on the appliance to which files will be backed up. The Local Disk Space Usage field indicates the amount of used space on the disk after the next local backup operation, out of the total amount of space available on the disk.

See Also

Overview

Agent Licensing

Workflow

Downloading and Installing CTERA Agent

Configuring Global Settings for All CTERA Agents

Opening the CTERA Agent Manager

Configuring the Agent

Manually Starting Agent Backup

Stopping the Current Backup Operation of an Agent

Disabling and Enabling Agent Backups

Viewing Agent Backups

Restoring Files and Folders from the Appliance to the Agent

Viewing the Agent Status

Viewing Agent Details

Monitoring Agents

Deleting Agents