- In the File Manager, change to the Volumes view.
See Changing the Tree Pane View.
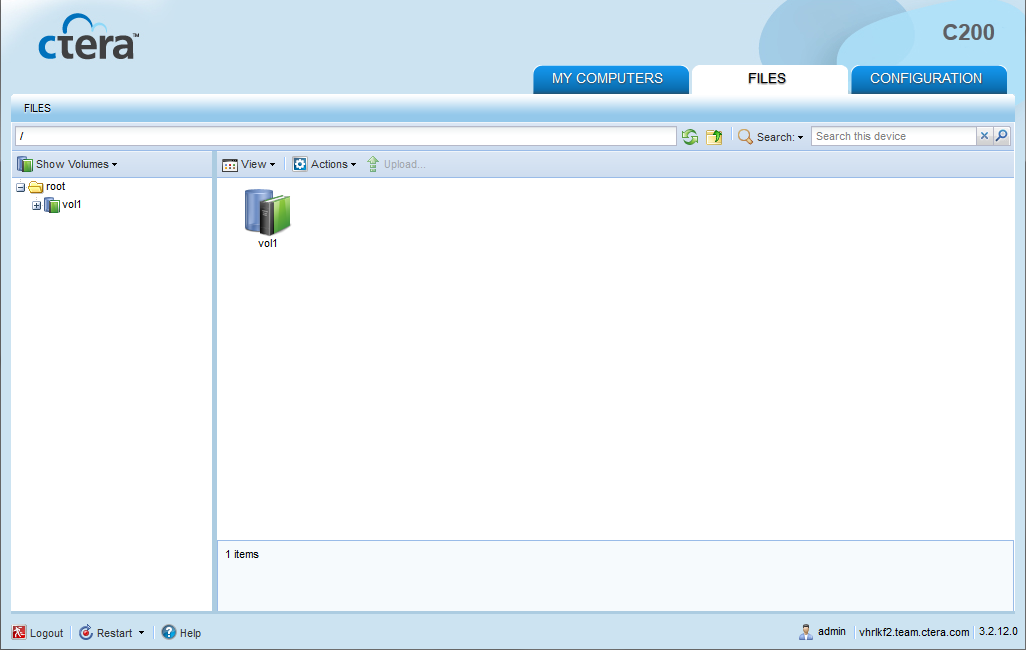
- Navigate to the desired folder.
See Navigating Between Folders.
- In the right pane, select the desired folder.
- Click Actions, and then click Share.
The Network Share Wizard opens, displaying the Specify the Network Share Name dialog box.
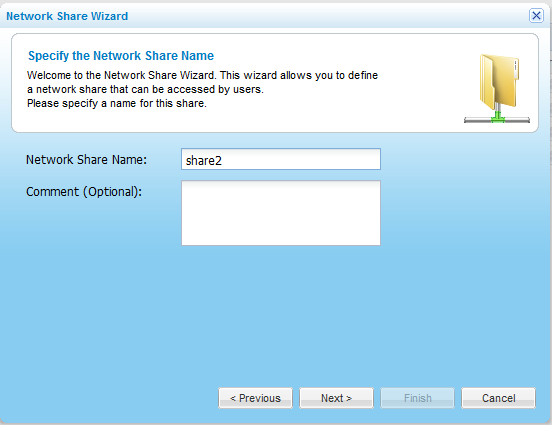
- In the Network Share Name field, type a name for the share.
By default, the folder's name is filled in.
- (Optional) In the Comment field, type a description of the network share.
- Click Next.
The Sharing Protocols dialog box appears.
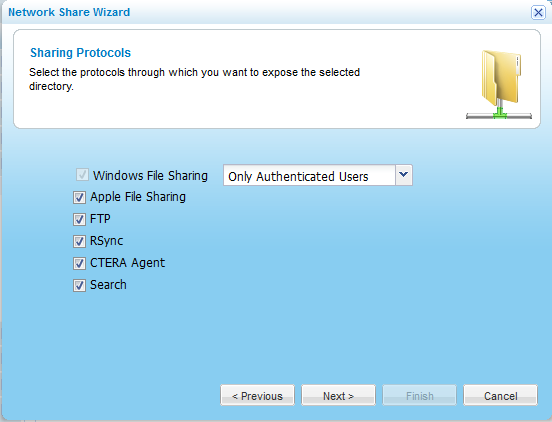
- Select the protocols through which you want to expose the network share.
Windows File Sharing is selected by default and cannot be unselected.
- To enable full text search for the share, select Full Text Search.
For information on full text search, see Up Full Text Search.
- In the Windows File Sharing drop-down list, specify tSetting he permitted level of access to the network share via Windows File Sharing, by selecting one of the options described in Share Access Options.
- Click Next.
The NFS (UNIX File Sharing) dialog box appears.
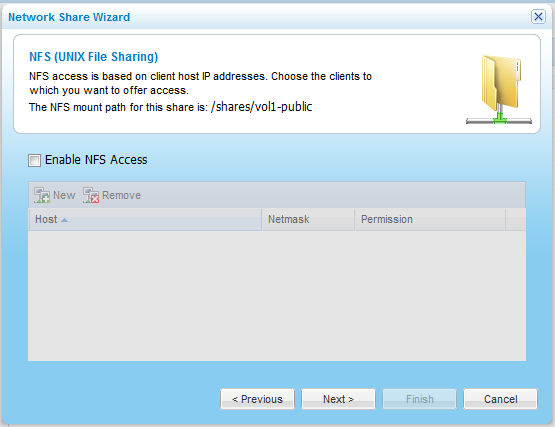
- To enable NFS access to the network share, do the following:
- Select the Enable NFS Access check box.
- Add the IP addresses of clients that should be allowed NFS access to network share, by doing the following:
- Click New.
The IP address 0.0.0.0 appears in the table.
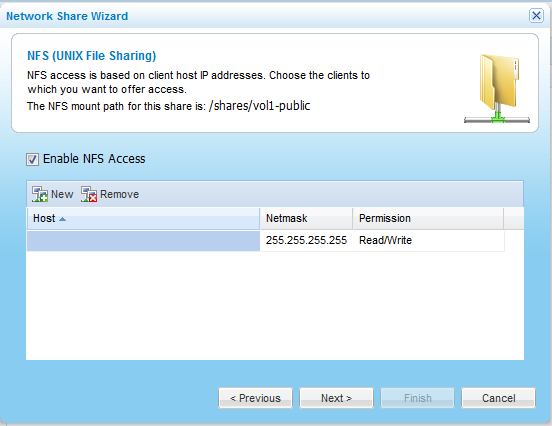
- Click in the Host column and edit the IP address.
- Click in the Permission column and select the permitted level of access to the network share via NFS.
Options include None, Read Only, and Read/Write.
- Remove client host IP addresses, by selecting the desired IP address and clicking Remove.
|
Tip
|

|
The NFS mount path for the network share is specified at the top of the dialog box.
|
- Click Next.
The Configure Permissions dialog box appears with a list of users and user groups.
- Add each user and user group who should have access to the network share, by doing the following:
- In the Local Users drop-down list, select one of the following:
- Local Users. Search the users defined locally on the appliance.
- Domain domain Users. Search the users belonging to the domain called domain.
- Local Groups. Search the user groups defined locally on the appliance.
- Domain domain Groups. Search the user groups belonging to the domain called domain.
- In the Quick Search field, type a string that appears anywhere within the name of the user or user group you want to add, then click
 .
.A table of users or user groups matching the search string appears.
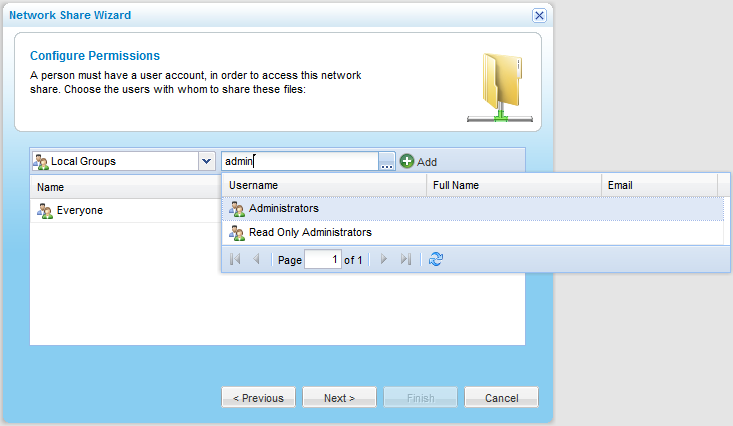
- Select the desired user or user group in the table.
The user or user group appears in the Quick Search field.
- Click Add.
The user or user group is added to the list of users and user groups who should have access to the network share.
For information on editing users, see Adding and Editing Users.
- To remove a user or user group, in their row, click
 .
.The user or user group is removed from the table.
- In each user and user group's row, click in the Permission column, then select the desired access level from the drop-down list.
Options include None, Read Only, and Read/Write.
- To remove a user or user group, in their row, click .
The user or user group is removed from the table.
- Click Next.
The Wizard Completed screen appears.
- Click Finish.
In the File Manager, the folder's icon changes to  .
.