Managing Add-Ons
In a team portal, all users obtain additional services for a specified period of time, when the portal is subscribed to a global add-on. In contrast, users in reseller portals can subscribe to add-ons, each of which defines a set of services that subscribed users will receive in addition to the services specified in the subscription plan, for a specified period of time.
This section describes how to provision services to virtual portals (including both reseller and team portals) via global add-ons, as well as how to use add-ons to provision services to user's devices (in reseller portals).
In order to provision global add-ons, these tasks must be performed in the Global Administration View.
In this section
Adding and Editing Add-ons
Once you have added an end-user add-on to the portal, you can then add the add-on directly to user accounts, as described in Adding Add-ons to User Accounts. Alternatively, for a "pre-paid" business model, you can create vouchers for the add-on, as described in Adding Vouchers. End users can then redeem the vouchers in order to add the add-on to their user accounts.
Once you have added a portal-level add-on to the system, you can then add the add-on directly to a portal, as described in
Adding Global Add-ons to Virtual Portals.
To add or edit an add-on:
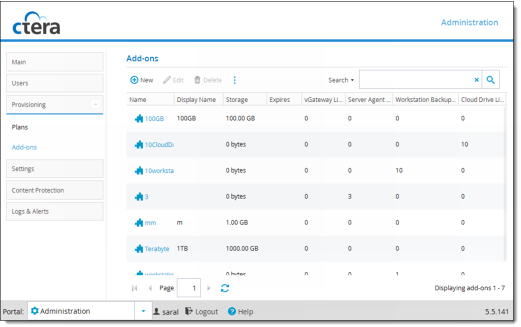
1 In the navigation pane, click Provisioning > Add-ons.
The Provisioning > Add-ons page opens, displaying all add-ons.
2 Do one of the following:
• To add a new add-on, click New.
• To edit an existing add-on, select the desired add-on row and then click Edit.
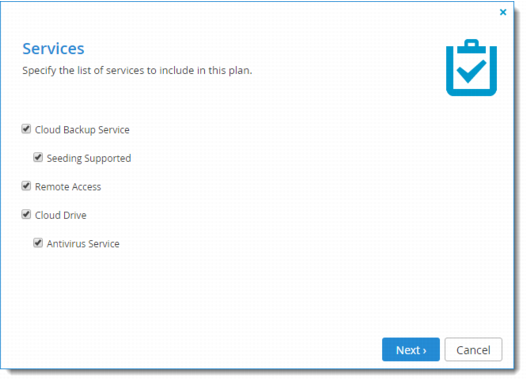
The Add-on Wizard opens displaying the Add-on Wizard dialog box.
3 Complete the fields.
Cloud Backup Service –The Cloud Backup Service is included in the add-on. This field is read-only.
Seeding Supported – Include backup seeding in the add-on.
Remote Access – Include remote access in the add-on. Remote access includes both access to the device's management interface via the CTERA Portal and a dedicated URL, access to the user's files via the CTERA Portal and a dedicated URL.
Note: Device owners can disable remote access via the device's management interface.
Cloud Drive – Include private cloud drives in the add-on. In a team portal, users will be able to access the private cloud drive in addition to the team cloud drive.
Users will be able to access their cloud drives via the End User Portal's Files tab, for the purpose of viewing, uploading, and downloading files.
Antivirus Service – Include the Cloud Drive Antivirus service in the add-on. When antivirus is activated, files are scanned for malware automatically and transparently, before they are downloaded for the first time. The Cloud Drive antivirus service requires an additional license.
4 Click Next.
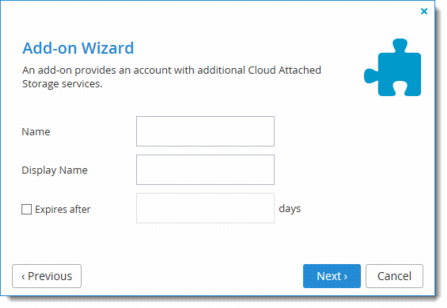
A second Add-on Wizard dialog box is displayed.
5 Complete the fields.
Name – A name for the add-on.
Display Name – The name to use when displaying this add-on in the End User Portal and notifications.
Expires after – An expiration date for the add-on. Enter the number of days after the add-on has been added to the user account that the add-on should expire.
6 Click Next.
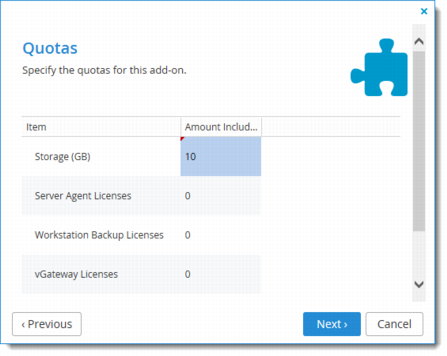
The Quotas dialog box is displayed.
7 For each item, click in the Amount Included field, and then type the number of item units to include in the subscription plan.
For example, to include 5GB of storage space, click in the Storage Quota (GB) item's Amount Included field and type 5.
8 Click Next.
The Wizard Complete screen is displayed.
9 Click Finish.
If you edited an existing add-on, the following things happen:
• Provisioning changes are applied to all users, and the Apply Provisioning Changes window opens displaying Running screen with a progress bar that tracks the operation's progress.
To stop the process, click Stop. To close the progress bar, while the process continues in the background, click Continue in Background.
• When the operation is complete, the Completed screen is displayed.
10 Click Close.