Tip
![]()
After running the setup wizard, it is possible to reset the setup wizard in order to run it again. To reset the setup wizard, open the file /etc/ctera/portal.cfg and change CTERA-INIT-REQUIRED to yes and restart the portal.
This procedure is performed only once, on the master server.
|
Tip |
|
After running the setup wizard, it is possible to reset the setup wizard in order to run it again. To reset the setup wizard, open the file /etc/ctera/portal.cfg and change CTERA-INIT-REQUIRED to yes and restart the portal. |
To perform initial CTERA Portal setup of the master server
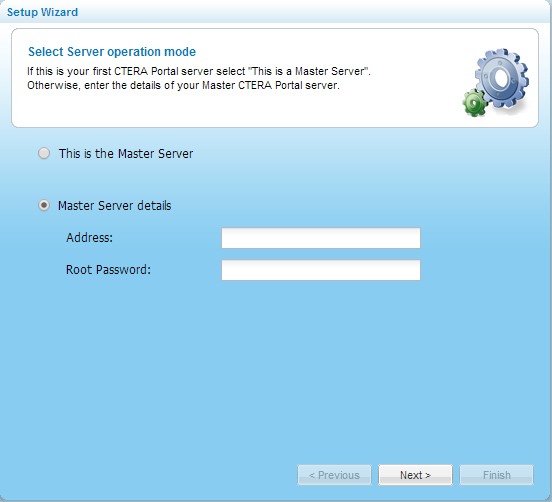
The Setup Wizard opens displaying the Select Server operation mode screen.
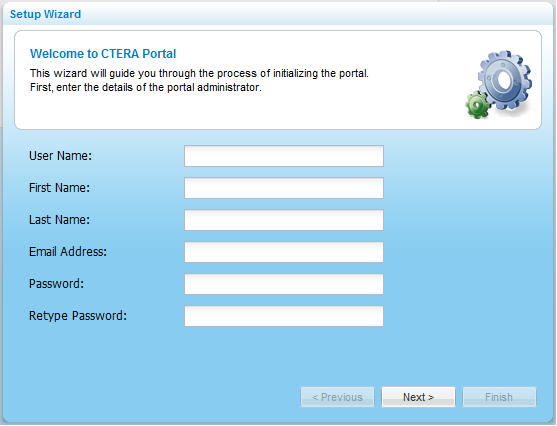
The Welcome screen appears.
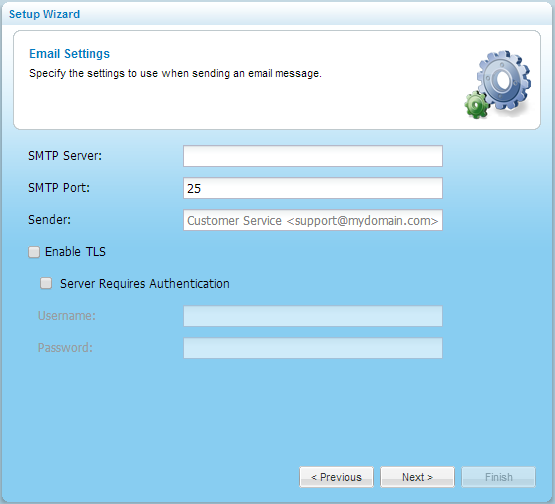
The Email Settings dialog box appears.
The DNS Domain dialog box appears.
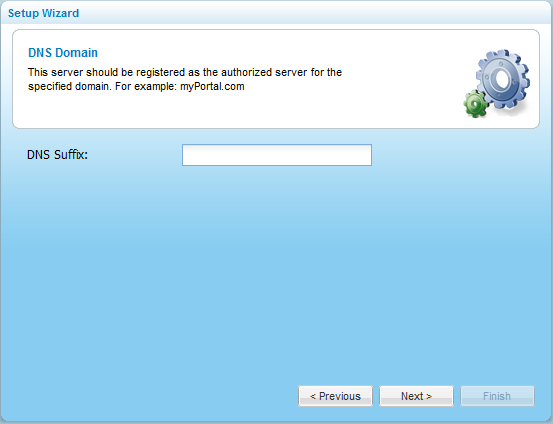
For example, if a virtual portal's name is "myportal", and the DNS suffix is "acme.com", then the virtual portal's DNS name will be "myportal.acme.com".
The Wizard Completed dialog box appears.

A success message appears.
CTERA Portal opens displaying the Administrator Login page.

The Global Administration View appears displaying the Main > Dashboard page.
By default, CTERA Portal creates a reseller portal called "portal". For information about how to rename, view and edit this portal, or create additional reseller or team portals, see the CTERA Portal Administration Guide.
In this field... |
Do this... |
|
Username |
Type a user name for your CTERA Portal administrator account. |
|
First Name |
Type your first name. |
|
Last Name |
Type your last name. |
|
Email Address |
Type your email address. |
|
Password / Retype Password |
Type a password for your CTERA Portal administrator account. |
|
SMTP Server |
Type the outgoing mail server address for sending email messages from CTERA Portal to users. |
|
SMTP Port |
Type the port number for sending email messages from CTERA Portal to users. |
|
Sender Email |
Type the email address that should appear in the From field of notifications. For example: "CTERA Customer Service <support@ctera.com>". |
|
Enable TLS |
Select this option to use Transport Layer Security (TLS) encryption for sending email messages from CTERA Portal to users. |
|
Server requires authentication |
Select this option if the SMTP server requires authentication. |
|
User Name |
Type the user name that CTERA Portal should use when authenticating to the SMTP server. |
|
Password |
Type the password that CTERA Portal should use when authenticating to the SMTP server. |
|
See Also |