Centrally Installing CTERA Agent Via Active Directory
The following procedure describes installation using a Windows 2012 Active Directory domain. It is similar for Windows Server 2016.
To centrally install CTERA Agent:
1 Perform the following steps to prepare the CTERA Agent installation file for central use:
a On the Active Directory machine, create a shared folder called Agent under C:\.
b Copy the CTERA Agent installation file to a local disk, for example, C:\Agent.
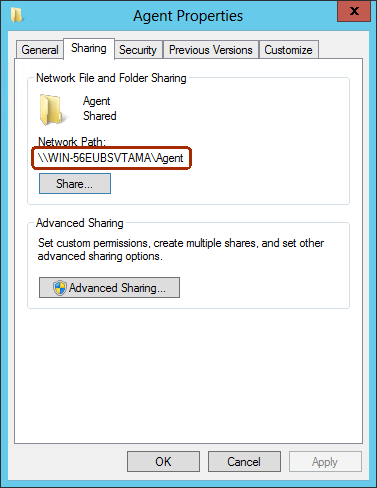
c Right-click the folder, and then click Properties.
The Agent Properties window is displayed.
d Select the Sharing tab.
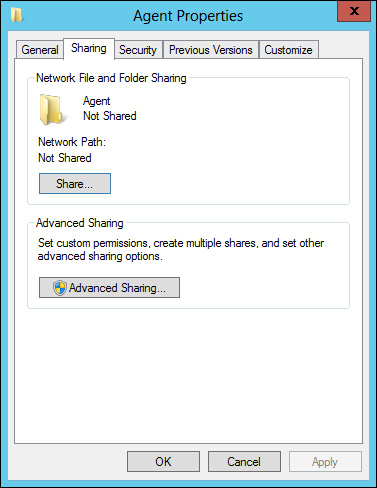
e Click Share.
The File Sharing window is displayed.
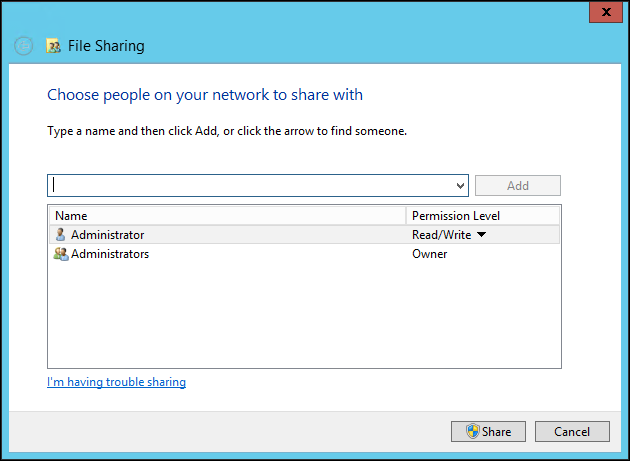
f Perform the following steps for each user or user group for which you would like to install CTERA Agent.
i Specify the user/group, either by typing the user/group's name in the field, or by clicking the drop-down list arrow and then clicking Find people.
To enable installing CTERA Agent for all users/groups, select Everyone.
ii Click Add.
The user/group is displayed in the file sharing list.
iii In the user/group's row, click on the arrow in the Permission Level column, then click Read.
iv Click Share.
The File Sharing window displays a success message.
g Click Done.
h Click Close to close the Agent Properties dialog.
2 Create a policy that controls the installation of CTERA Agent:
a In the Start menu, select Administrative Tools > Group Policy Management.
The Group Policy Management console is displayed:
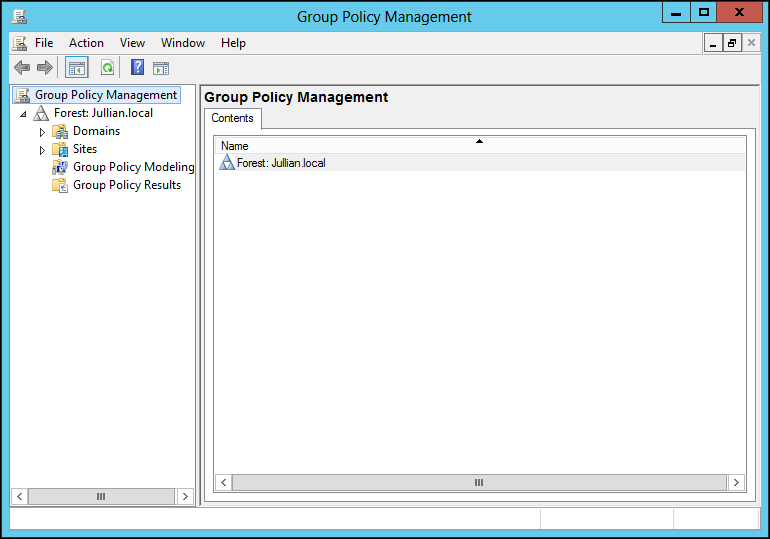
This console enables you to create domain-wide policies or policies for specific organizational units.
b In the navigation pane, drill-down to the domain or organizational unit for which you want to create the policy, right-click it and select Create a new GPO in this domain and Link it here.
The New GPO window is displayed.
c Enter a name for the policy and click OK.
d In the navigation pane, select the domain and in the right pane, select the Linked Group Policy Objects tab.
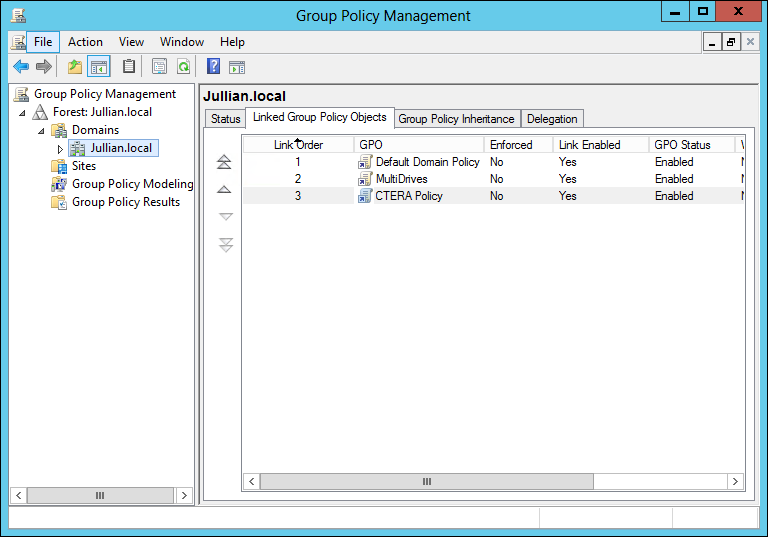
e Double-click the policy to display the policy.
Note: If a Group Policy Management Console message is displayed, click OK.
The policy details are displayed:

f In the Security Filtering area, perform the following steps for each user or user group for which you would like to install CTERA Agent:
i Click Add.
The Select User, Computer, or Group window is displayed.
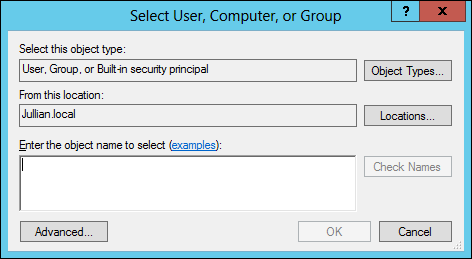
ii In the Enter the object name to select area, type the name of the user/group.
To enable installing CTERA Agent for all users/groups, type Everyone.
iii Click OK.
g Right-click the policy you created and select Edit.
The Group Policy Management Editor is displayed.

h In the navigation pane, expand User Configuration > Policies > Software Settings, right-click Software Installation and select New > Package.
The Open window is displayed.
i Specify the network location of the shared folder containing the CTERA Agent installation file that you created in step 1.
Note: The network location of the shared folder is displayed in the folder's Properties window, in the Sharing tab.
j Click Open.
The Deploy Software window is displayed.

k Select Assigned.
This option ensures that when a user or group specified in the policy's Security Filtering area logs in to the domain, CTERA Agent is automatically installed on the user or group's computer.
l Click OK.
3 Add the ctera-agent.adm file to Domain Group Policy as an administrative template using the following steps.
Note: The ctera-agent.adm file contains the agent deployment settings.
a Right-click the policy you created and select Edit.
The Group Policy Management Editor is displayed.
b In the navigation pane, expand Computer Configuration > Policies > Administrative Templates, right-click Administrative Templates and select Add/Remove Templates.
The Add/Remove Templates window is displayed.
c Click Add and select the ctera-agent.adm file and then click Open.
d Click Close.
e In the navigation pane, expand Computer Configuration > Policies > Administrative Templates > Classic Administrative Templates and click the CTERA Agent Settings node.

f Right-click Enable CTERA Agent automatic deployment and select Edit.
The Enable CTERA Agent automatic deployment window is displayed.

g Specify the following:
Enabled – Set the Enabled option.
Sign into server – Type the fully qualified DNS name of the CTERA Portal or Gateway to which the CTERA Agent should connect.
h Click OK.
Example ctera-agent.adm File
CLASS MACHINE
CATEGORY !!CteraAgent
KEYNAME "Software\Policies\CTERA\Agent"
POLICY !!USESSO
EXPLAIN !!USESSO_Explain
VALUENAME "SSO"
VALUEON NUMERIC 1
VALUEOFF NUMERIC 0
PART !!SSO_Server EDITTEXT REQUIRED
VALUENAME "SSOServer"
END PART
PART !!SSO_Tip TEXT
END PART
END POLICY
END CATEGORY
[strings]
USESSO="Enable CTERA Agent automatic deployment"
USESSO_Explain="With this policy you can automatically deploy CTERA Agents.\n\n When this policy is disabled, or not configured, each CTERA agent must be manually connected to a CTERA portal or CTERA Cloud-Attached-Storage appliance.\n\n When this policy is enabled, the CTERA Agent installed on the computer automatically signs into the CTERA portal or appliance designated by the policy. When a user logs on to the machine for the first time, CTERA agent immediately signs into the designated server, using the credentials of that user."
SSO_Server="Sign into server"
SSO_Tip="Use the Fully-Qualified DNS name of a CTERA portal or a CTERA appliance. The target server must be a member of this Active Directory domain."
CteraAgent="CTERA Agent Settings"