Installing the Virtual Gateway in a Nutanix AHV Environment
You can install a CTERA Gateway via the Nutanix Prism console by creating and configuring a virtual machine and then performing an initial setup.
In this section
Installing the Virtual Gateway
The edge filer (gateway) can be installed in a Nutanix AHV environment.
Contact CTERA Networks, and request the latest qcow2 edge filer (gateway) disk image. Add this image to the machine where you run the Nutanix Prism Central console.
To install the CTERA Edge Filer in a Nutanix AHV environment:
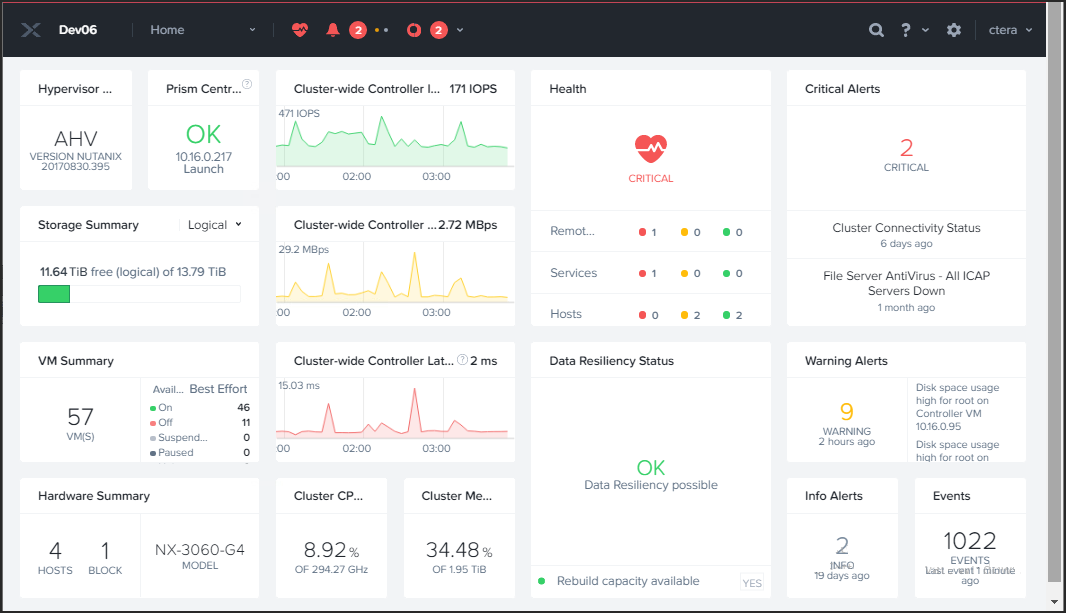
1 Log in to the Nutanix Prism Central console.
The dashboard is displayed.
2 Click Home > Settings in the top bar.
The Settings page is displayed.
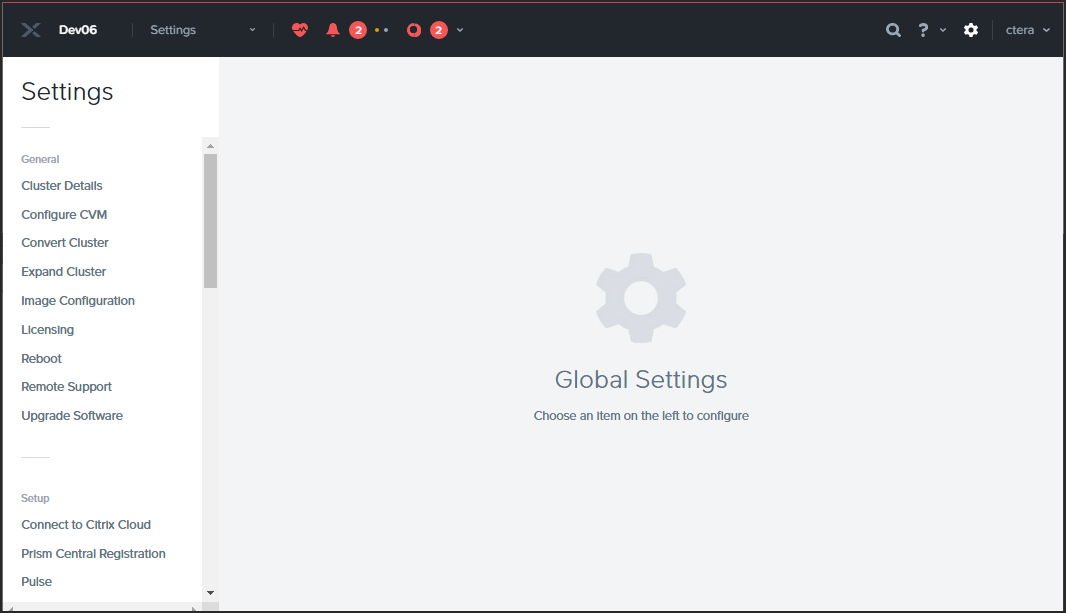
3 Click Image Configuration in the navigation pane.
The Image Configuration page is displayed.
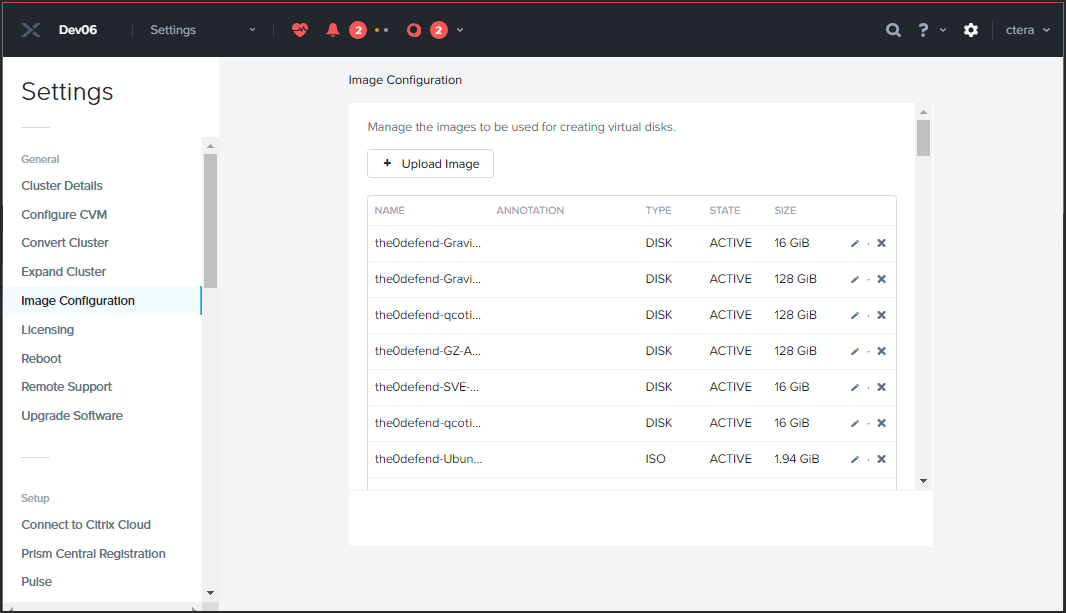
4 Click Upload Image.
The Create Image window is displayed.
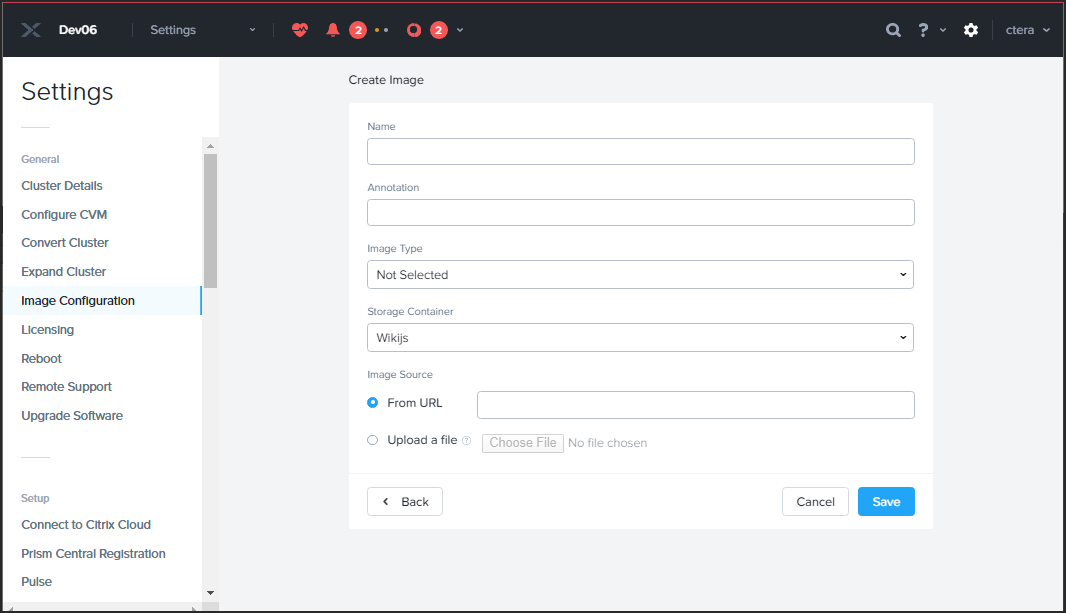
5 Specify the details for the edge filer image.
Name – A unique name to identify the image.
Annotation – An optional description of the image.
Image Type– Set to DISK.
Storage Container – Set the storage container to SelfServiceContainer.
6 Choose the Upload a file option and browse to the qcow2 image file from CTERA support.
7 Click Save.
The progress of the image creation is displayed in the page under the top bar.

8 Click Settings > VM in the top bar.
The VM page is displayed.
9 If necessary, change the view from Overview to Table, to list all the VMs.
10 Click Create VM.
The Create VM window is displayed.
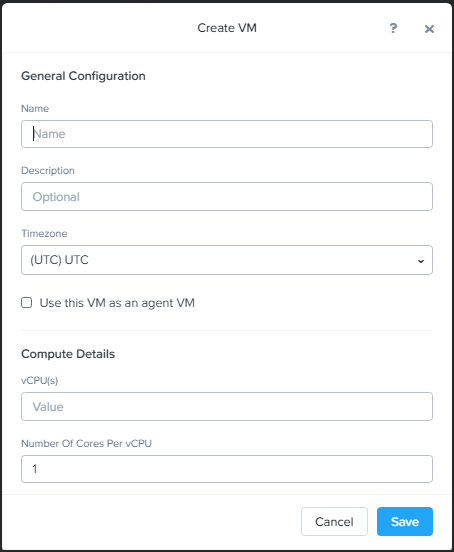
11 Specify the details for the VM.
Name – A unique name to identify the edge filer.
Description – An optional description of the edge filer.
Timezone – The timezone for the VM. The default is the local timezone.
Use this VM as an agent VM – Leave unchecked.
vCPU(s) – The number of vCPUs. This value is dependent on the gateway license.
For an EV16 license the maximum is 4 vCPUs.
For an EV32 license the maximum is 8 vCPUs.
For an EV64 license the maximum is 16 vCPUs.
For an EV128 license the maximum is 32 vCPUs.
Number Of Cores Per vCPU – The number of cores per vCPU. Leave the default value.
12 Scroll down to complete the details for the VM.
Memory – The memory usage is dependent on you gateway license. The minimum RAM requirement is 2GB (2048MB).
For an EV16 license the maximum is 8GB.
For an EV32 license the maximum is 16GB.
For an EV64 license the maximum is 32GB.
For an EV128 license the maximum is 64GB.
Disks – Add a disk for the virtual gateway software. The minimum recommended disk size is 16GB.
a Click Add New Disk.
The Add Disk window is displayed.
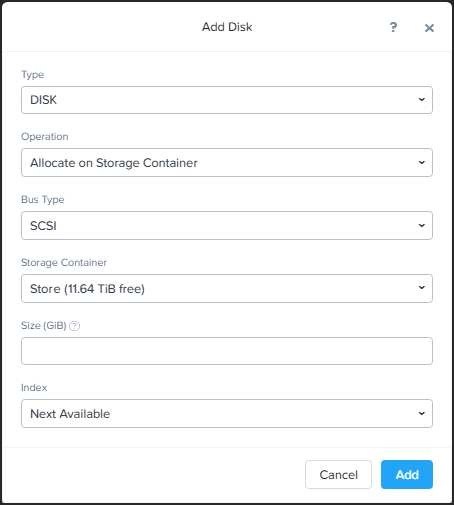
b Specify the details for the disk.
Type – The type of disk. Select DISK.
Operation – Select the Clone from Image Service from the drop-down list.
Image – Select the CTERA gateway image from the drop-down list.
c Leave the other fields with the default values and click Add.
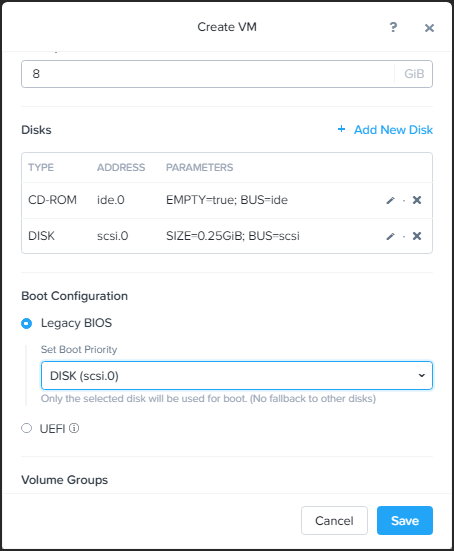
13 Under Boot Configuration, choose the Legacy BIOS option and select the added disk to be the boot device in the Set Boot Priority text box.
14 Add a second disk for the gateway data.
a Click Add New Disk.
The Add Disk window is displayed.
b Specify the details for the disk.
Type – The type of disk. Select DISK.
Operation – Select the Allocate from Storage Container from the drop-down list.
Storage Container – Select the storage container from the drop-down list.
Size (GiB) – The disk size. When configured as a Caching Gateway, CTERA recommends storage at least 20% of the Portal Global Name Space. The maximum storage is dependent on the license.
For an EV16 license the maximum is 16TB.
For an EV32 license the maximum is 32TB.
For an EV64 license the maximum is 64TB.
For an EV128 license the maximum is 128TB.
c Leave the other fields with the default values and click Add.
15 Optionally, follow your site best practices to ensure optimal performance of the VM on the cluster, in cases of node failure.
The Set VM Host Affinity window is displayed.
a Under VM Host Affinity, click Set Affinity to enable the VM to another host in the cluster.
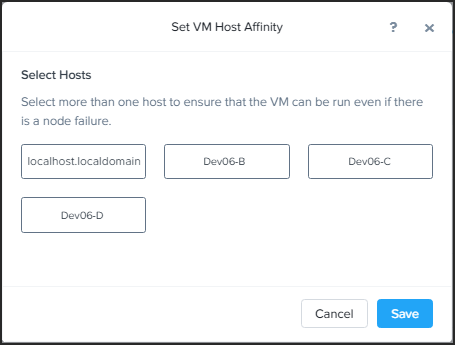
b Select the hosts under which the VM will run in the case of a node failure.
c Click Save.
16 Click Save.
The VM is created.
17 From the list of virtual machines (Table view), select the new virtual machine and scroll down to display details of the VM.
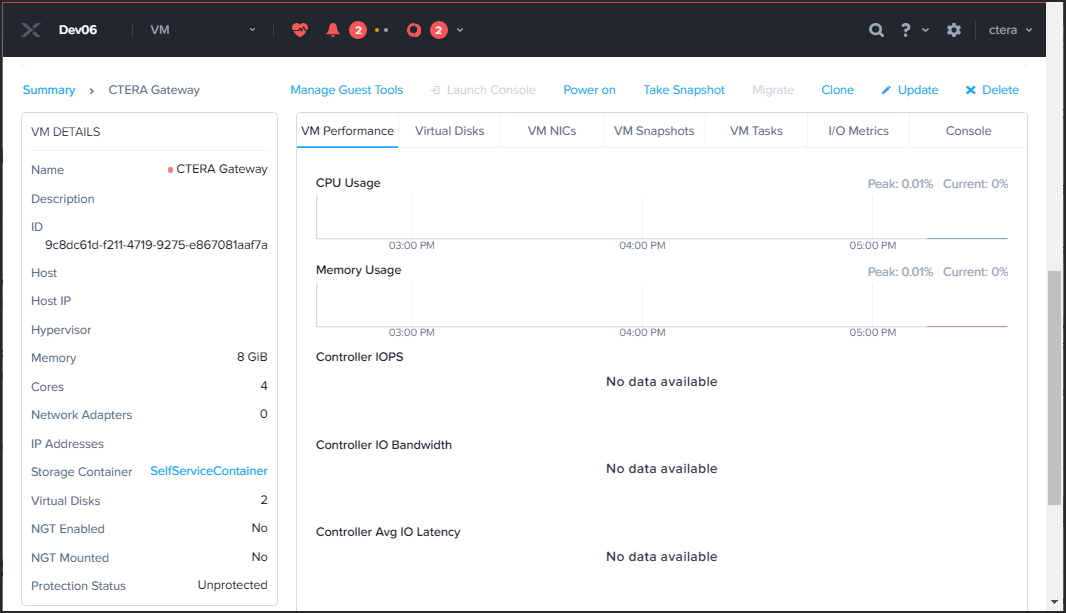
18 Click Power On.
The VM is powered on and the Launch Console option is enabled.
19 Click Launch Console to open the console to get the IP address for the gateway.
The console is displayed.
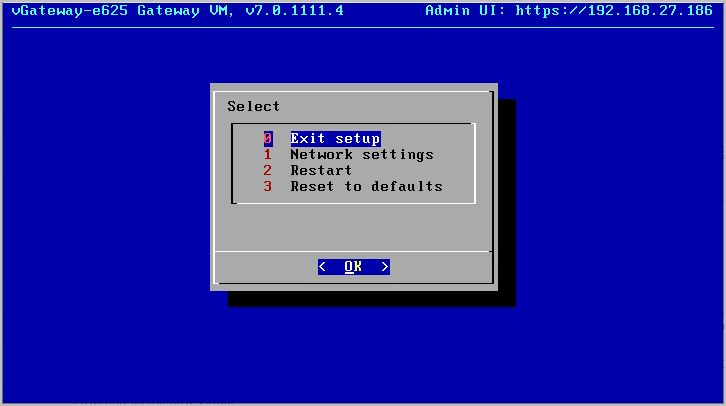
Note: The console might have other options.
The IP address for the gateway is displayed in the top right of the console. You use this IP address to access the gateway in a browser.
To set a static IP address:
1 Click in the console to transfer the keyboard control to the console and, if necessary, use the arrow keys to scroll to Network settings.
2 Press Enter.
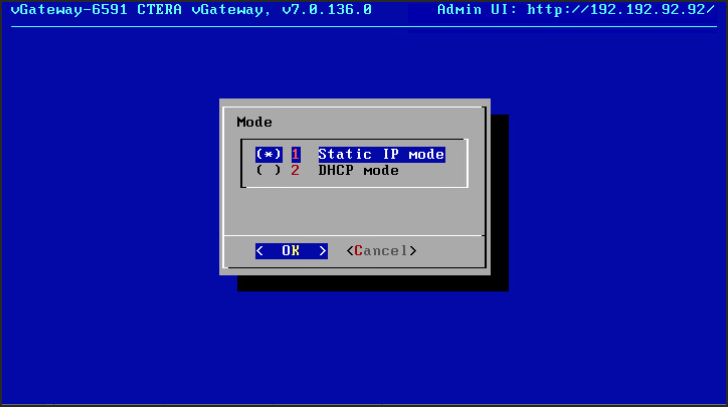
3 Select Static IP mode and press OK.
4 Complete the configuration for static mode by entering the static IP, netmask, default gateway IP and the primary and secondary DNS server IPs.
5 Press OK.