Installing the Virtual Gateway in a KVM Environment
You can install a CTERA Gateway on KVM via the OpenStack console or another console. The following instructions describe how to install a CTERA Gateway using the OpenStack console and involves creating and configuring a virtual machine and then performing an initial setup.
In this section
Installing the Virtual Gateway
The gateway can be installed in a KVM environment.
Contact CTERA Networks, and request the latest qcow2 gateway disk image.
To install the Virtual Gateway in a KVM environment:
To install the Virtual Gateway in OpenStack:
1 Log in to the OpenStack console and access Admin > Images.
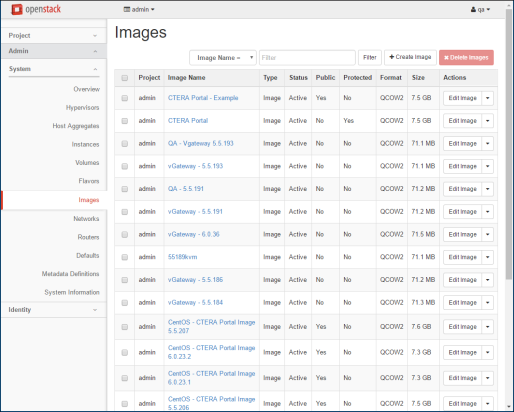
2 Click Create Image.
The Create An Image screen is displayed.

3 Specify the details for the image.
Name – A unique name to identify the image.
Description – An optional description of the image.
Image Source – Select Image File.
Image File – Browse to the OpenStack image received from CTERA.
Format – Select QCOW2 - QEMU Emulator.
Architecture – Leave blank.
Minimum Disk – The recommended disk size is 16GB.
Minimum RAM – The minimum RAM requirement is 2GB (2048MB). The maximum RAM usage is dependent on the gateway licenseEV16 supports a maximum RAM of 8GB.
EV32 supports a maximum RAM of 16GB.
EV64 supports a maximum RAM of 32GB.
EV128 supports a maximum RAM of 64GB.
You can leave both Public and Protected checkboxes with their default values.
4 Click Create Image.
The image is created. This can take a few minutes.
5 Access Project > Compute > Instances.
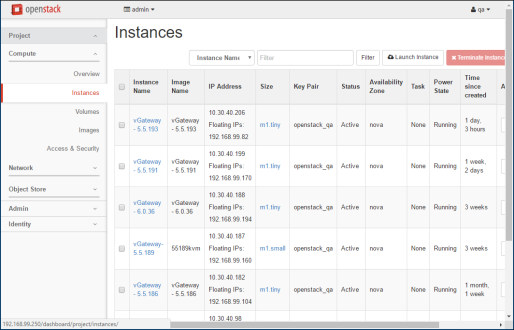
6 Click Launch Instance.
The Launch Instance screen is displayed.
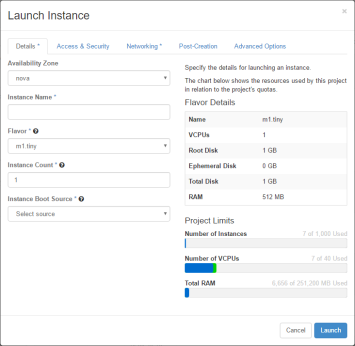
7 Specify the details for the image.
Availability Zone – Select the availability zone for the instance.
Instance Name – A unique name for the instance.
Flavor – Select a flavor to match the gateway license. For an EV16 license with a maximum of 4 vCPUs and 8GB RAM, such as m2.medium. For an EV32 license with a maximum of 8 vCPUs and 16GB RAM, such as m1.xlarge.
EV16 supports a maximum RAM of 8GB.
EV32 supports a maximum RAM of 16GB.
EV64 supports a maximum RAM of 32GB.
EV128 supports a maximum RAM of 64GB.
Instance Count – Leave the default value, 1.
Instance Boot Source – Select Boot from image.
Image Name – Select the image you created for the gateway.
8 Click the Networking tab and drag the internal_network option to Selected networks.
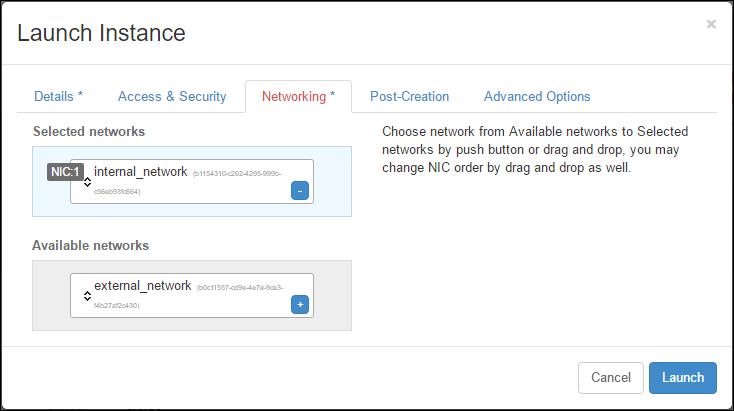
9 Click Launch.
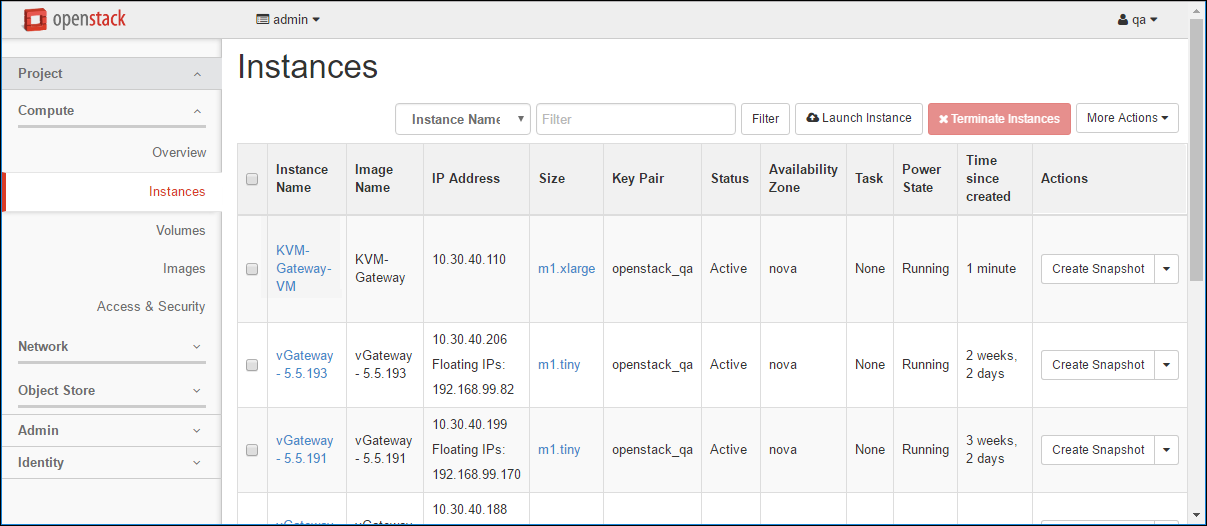
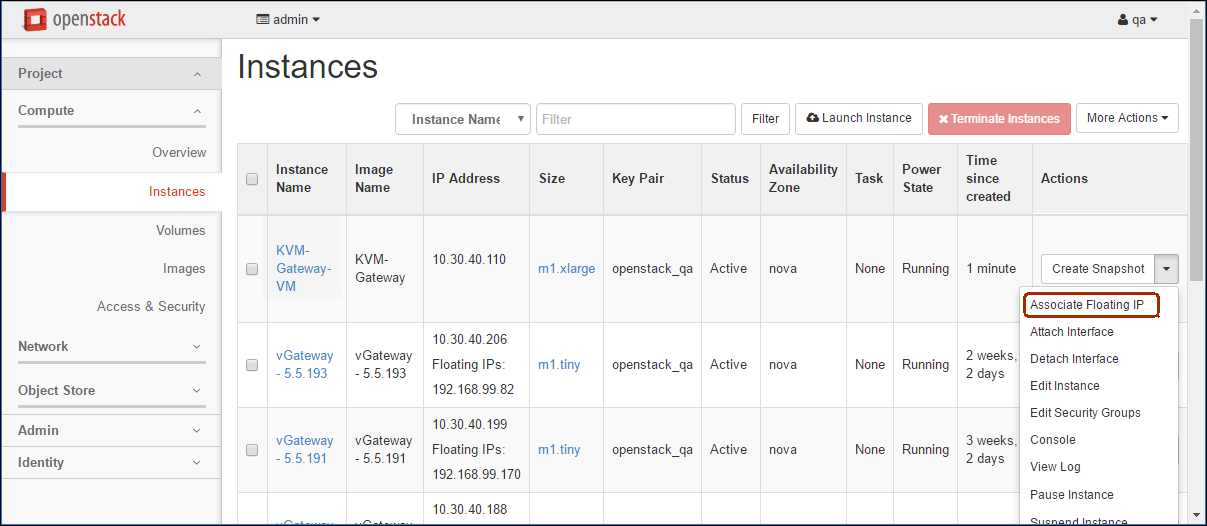
10 Select the gateway instance and under Actions select Associate Floating IP.
The Manage Floating IP Associations dialog is displayed.
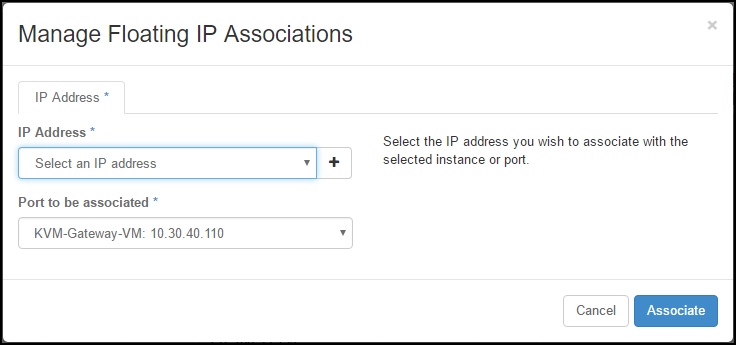
11 Select an IP address and click Associate.
Refreshing the Instances screen displays the gateway with the selected IP.
12 Access Project > Compute > Volumes.
13 Click Create Volume.
The Create Volume screen is displayed.
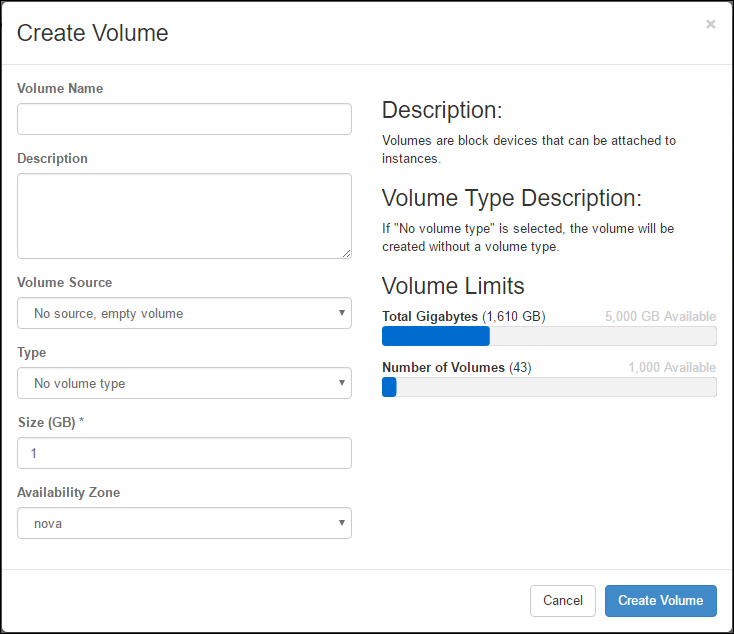
14 Specify the details for the image.
Volume Name – A unique name to identify the volume.
Description – An optional description of the volume.
Volume Source – Select No source, empty volume.
Type – Select iscsi.
Size – Specify the disk size. When configured as a Caching Gateway, CTERA recommends storage at least 20% of the Portal Global Name Space. The maximum storage is dependent on the license.
For an EV16 license the maximum is 16TB.
For an EV32 license the maximum is 32TB.
For an EV64 license the maximum is 64TB
For an EV128 license the maximum is 128TB
Availability Zone – Select the same availability zone used for the image.
15 Click Create Volume.
The volume is created. This can take a few minutes.
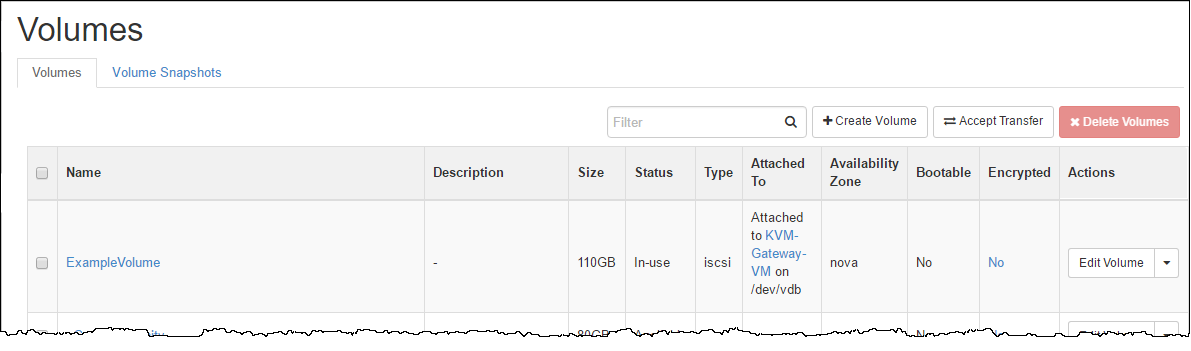
16 Select the new volume and under Actions select Manage Attachments.
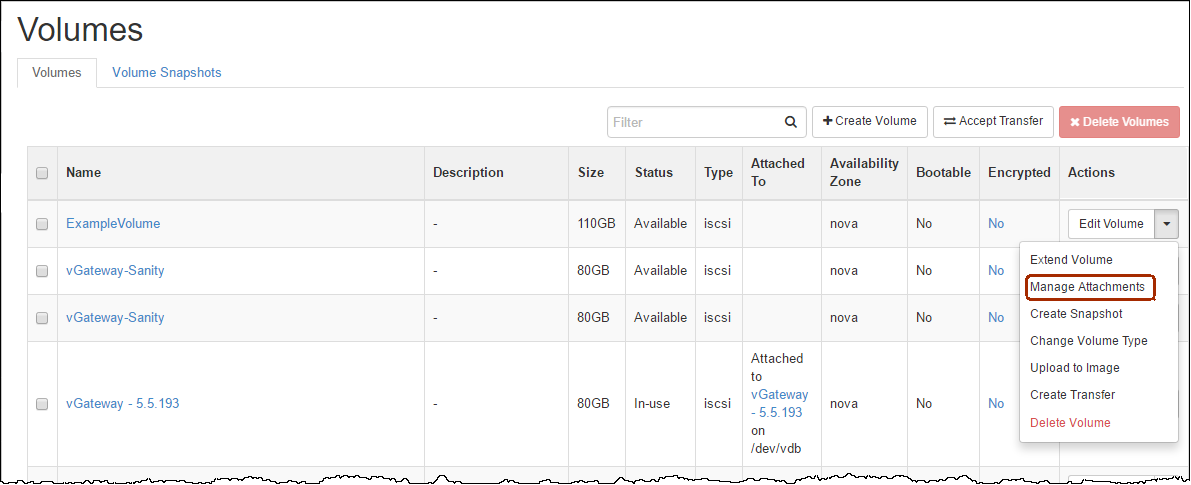
The Manage Volume Attachments dialog is displayed.

17 Under Attach To Instance, select the gateway instance and click Attach Volume.