In this field... | Do this... |
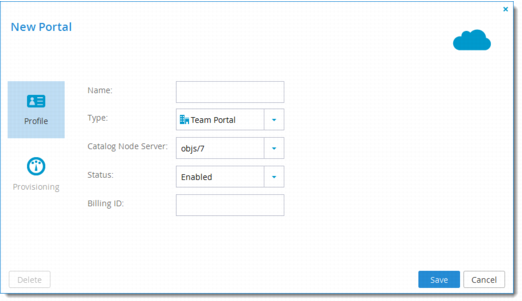
Name | Type a name (unique identifier) for the virtual portal. |
Type | Select the virtual portal's type: • Team Portal (default) • Reseller Portal For information on portal types, see Virtual Portals. This field is read-only, when editing an existing virtual portal. |
Catalog Node Server | Select the virtual portal's catalog node server. Catalog node servers are database servers that store metadata. CTERA Portal supports multiple catalog node servers for scalability. |
Status | Select the status of the virtual portal to Enabled or Disabled. If you set the status to disabled, the following things happen: • Users cannot log in to the portal, and devices cannot connect. • Reports and email notifications are not sent from the portal. • User self-registration is disabled. Global administrators can still connect to disabled portals via the Global Administration View. |
Billing ID | Optionally use this field to enter the virtual portal owner's billing ID. This enables integration of the portal with an external billing system. |
Enable Resource Provisioning | Deselect this box to allow a reseller unlimited quotas (subject only to the limits of the CTERA Portal license). If you deselect the box, the Provisioning tab disappears. |