The CTERA Agent Settings Window
The CTERA Agent it is managed using the CTERA Agent Settings window.
Accessing the CTERA Agent Settings Window
To access the CTERA Agent Settings window:
1 Either:
Right-click the CTERA Agent tray icon in the Menu Bar,  , and select Settings.
, and select Settings.Or,
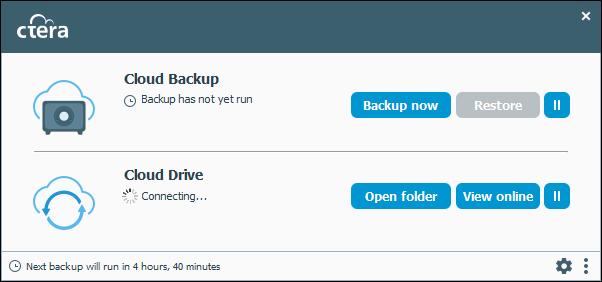
Click the gear icon in the bottom right corner of the CTERA Agent window.
If the currently logged in user account does not have sufficient credentials to manage the CTERA Agent, a Login page is displayed. To log in, enter the user name and password of an administrator or backup operator on this machine.
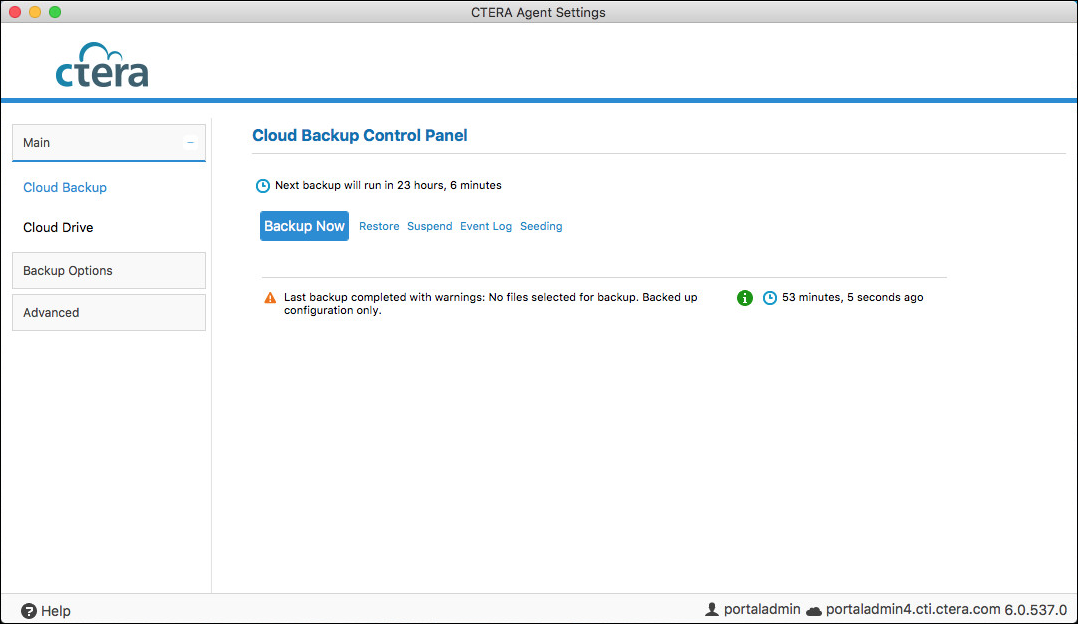
The CTERA Agent Settings window opens, displaying the Cloud Backup Control Panel page.
Configuring the CTERA Agent Language
You can configure a supported language to be displayed in the CTERA Agent's interface.
1 Right-click the CTERA Agent tray icon in the Menu Bar,  , and select Settings.
, and select Settings.Or,
Click the gear icon in the bottom right corner of the CTERA Agent window.
The CTERA Agent Settings window is displayed.
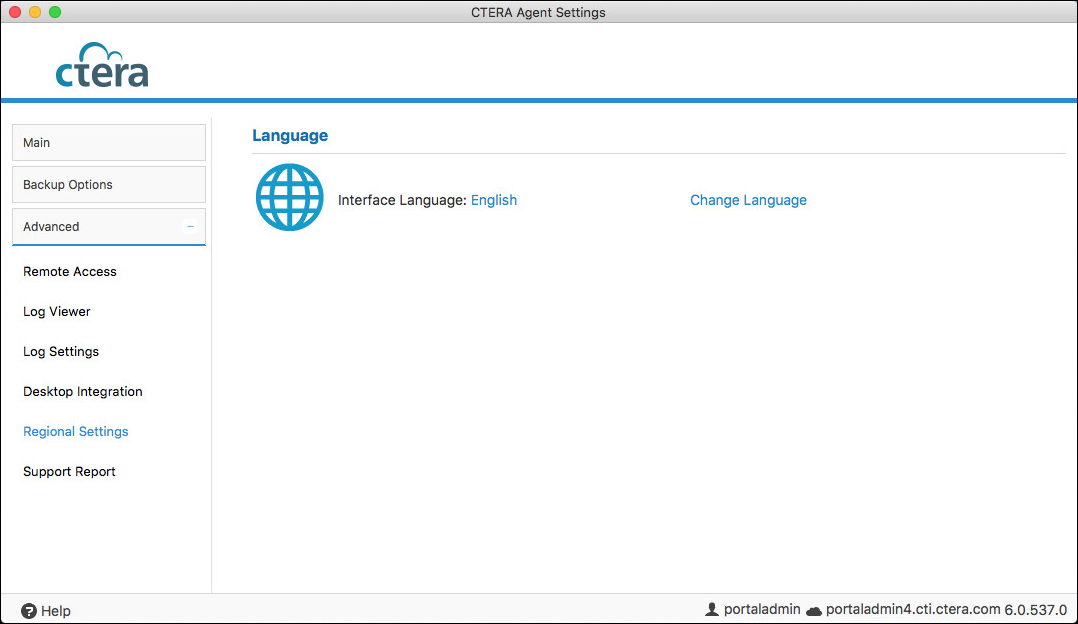
2 Click Advanced > Regional Settings in the navigation pane.
The Language page is displayed.
3 Click Change Language.
The Set Interface Language window is displayed.
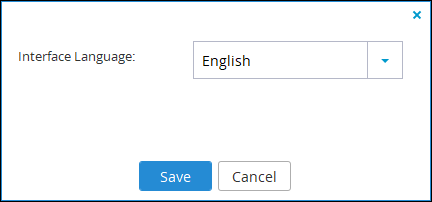
4 Select the language from the Interface Language drop-down list.
5 Click Save.
The user interface changes to the selected language.
Enabling and Disabling Remote Access
1 Right-click the CTERA Agent tray icon in the Menu Bar, , and select Settings.
, and select Settings.Or,
Click the gear icon in the bottom right corner of the CTERA Agent window.
The CTERA Agent Settings window is displayed.
2 Click Advanced > Remote Access in the navigation pane.
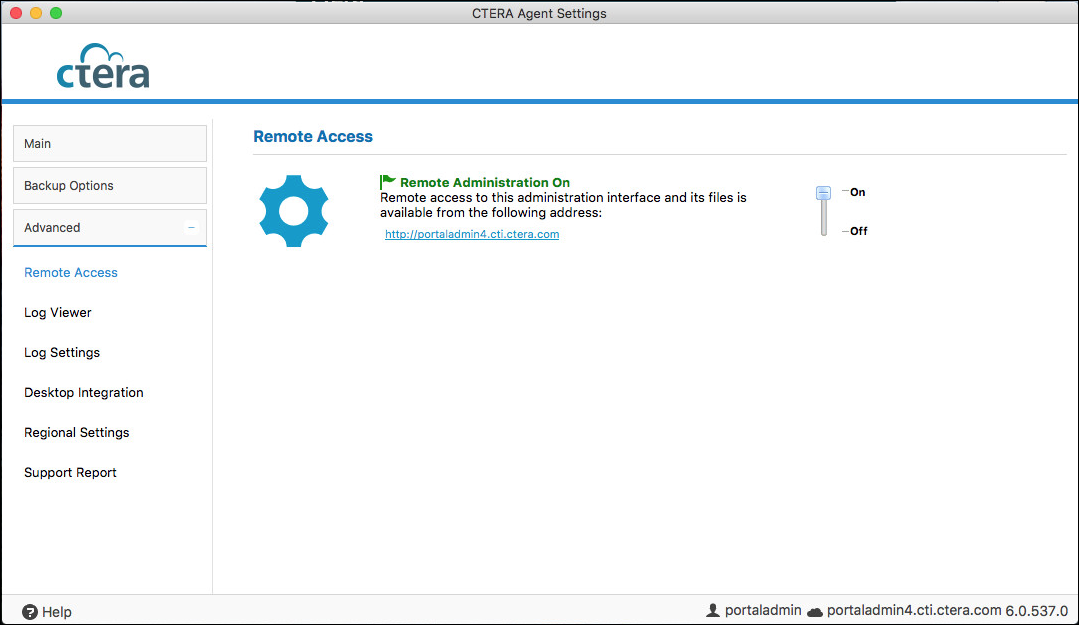
3 Slide the lever up to the On position turn remote access on.
When remote access is enabled, clicking the URL, or using the URL in any web browser accesses the CTERA Agent Settings window remotely.
Specifying Icons and Notifications For Files Handled By the CTERA Agent
By default, CTERA Agent features are integrated into Mac OS for optimal convenience. These include notifications that pop up and icons marking files and folders in Finder, to show you at a glance which files and folder are selected for backup.
The notifications also include a device connection is not stable alert, in the event a device connects or disconnects from the agent every few minutes.
You can disable and re-enable desktop integration features.
To specify desktop icons and notifications:
1 Right-click the CTERA Agent tray icon in the Menu Bar, , and select Settings.
, and select Settings.Or,
Click the gear icon in the bottom right corner of the CTERA Agent window.
The CTERA Agent Settings window is displayed.
2 Click Advanced > Desktop Integration in the navigation pane.

3 Specify the desktop settings.
Overlay icons on files and folders – Mark files and folders in Finder. Files and folders that are selected for backup are marked with the  icon. Folders for which only part of the contents are selected for backup are marked with the
  icon. Files and folders that are selected for sync are marked with the
  icon.
icon.
icon. Folders for which only part of the contents are selected for backup are marked with the icon. Files and folders that are selected for sync are marked with the icon.Show notification on backup start – Display a pop-up notification in the Mac Notification Center, when backup starts.
Show notification on backup end – Display a pop-up notification in the Mac Notification Center, when backup ends.
Show notification on backup fail – Display a pop-up notification in the Mac Notification Center, when backup fails.
Show notification on sync – Display a pop-up notification in the Mac Notification Center, if and when files are synced.
4 Click Save.