Globally Configuring CTERA Agents
Global configuration settings apply to all CTERA Agents. These settings include automatic file-level and disk-level backup scheduling, selection of the target network share on the gateway, file types that should be backed up, and more.
To configure settings for all agents:
1 In the CONFIGURATION tab, select Local Backup > CTERA Agents in the navigation pane.
The CTERA Agents page is displayed.
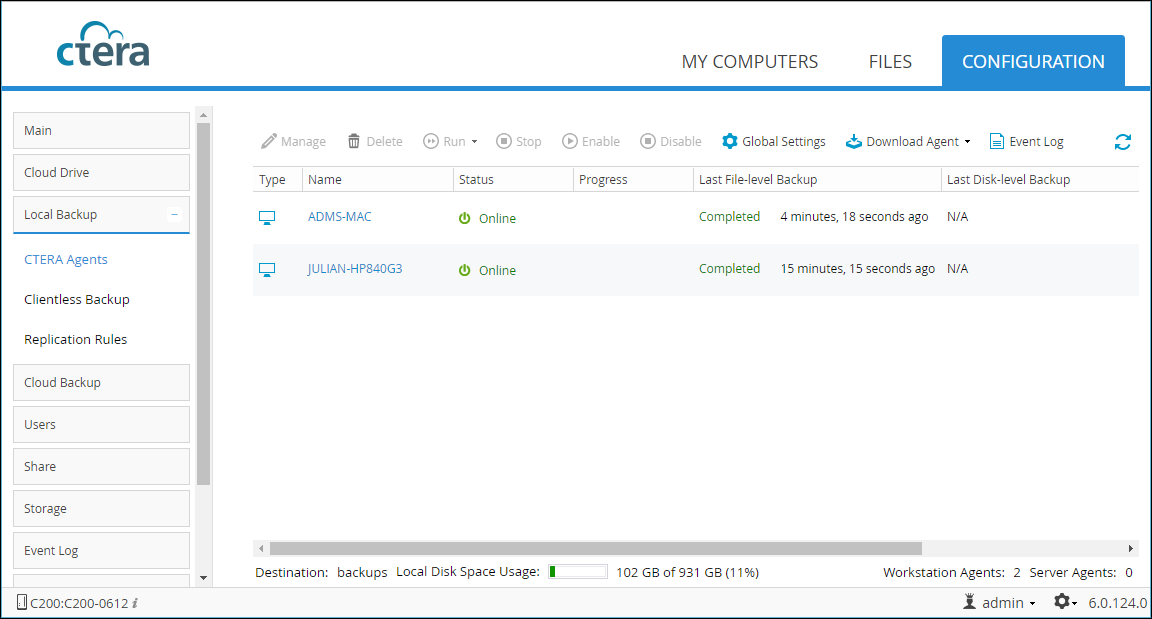
2 Click Global Settings.
The Global Agents Settings window is displayed.
3 Change the settings as required.
Destination Share – The gateway network share with which the files and folders from the CTERA Agent-enabled computer are backed up. Subfolders are automatically created under this network share for each backed up folder.
Use SSL Connection – Whether to use Secure Socket Layer (SSL) or Transport Level Security (TLS) encryption for connections from the CTERA Agent to the gateway:
Enabled – The CTERA Agent connects using SSL/TLS.
Disabled – The CTERA Agent does not connect using SSL/TLS.
Automatic – The CTERA Agent does not connect using SSL/TLS when in the same LAN as the gateway, and uses SSL/TLS when not in the same LAN as the gateway.
Maximum Concurrent Backups – The maximum number of backups that can occur at the same time. If the number of CTERA Agents concurrently attempting to perform a backup operation exceeds this limit, each agent over the limit will wait for the number of concurrent backups to drop below this threshold before commencing its own backup operation.
Allow user to configure the agent – Allow CTERA Agent users to configure their own agent. In order for CTERA Agent users to manage their own agents, this option must be selected, and the CTERA Agent users must have the Back up files and directories privilege on Windows, or be members of the ctera user group on Linux or Mac OS-X. For further information, refer to the CTERA Agent User Guide. When this option is cleared, selecting files for local backup can only be done by an administrator in the gateway user interface. CTERA Agent users cannot select files for backup locally, nor can they configure agent settings via the user interface. However, the user can still initiate backup and restore operations.
4 Click Save.
To configure file-level backup settings:
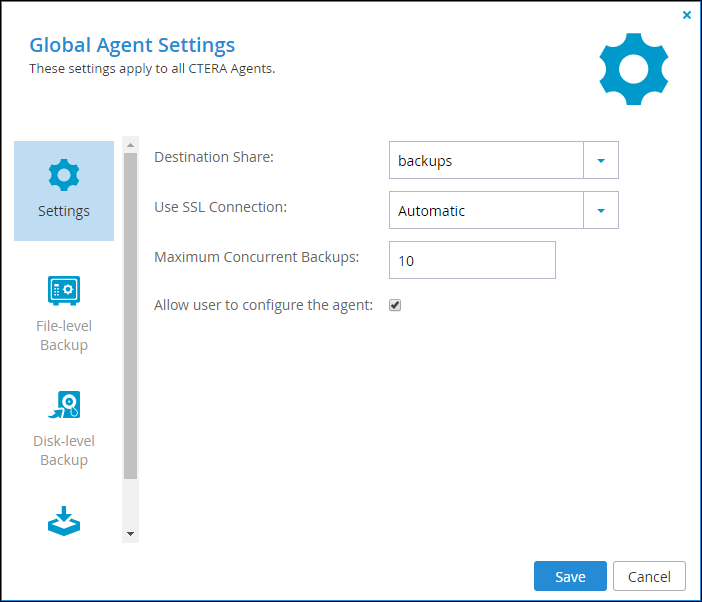
1 In the CONFIGURATION tab, select Local Backup > CTERA Agents in the navigation pane.
The CTERA Agents page is displayed.
2 Click Global Settings and select the File-level Backup option.
3 Change the settings as required.
Enable file-level backup – Check to enable file-level backup.
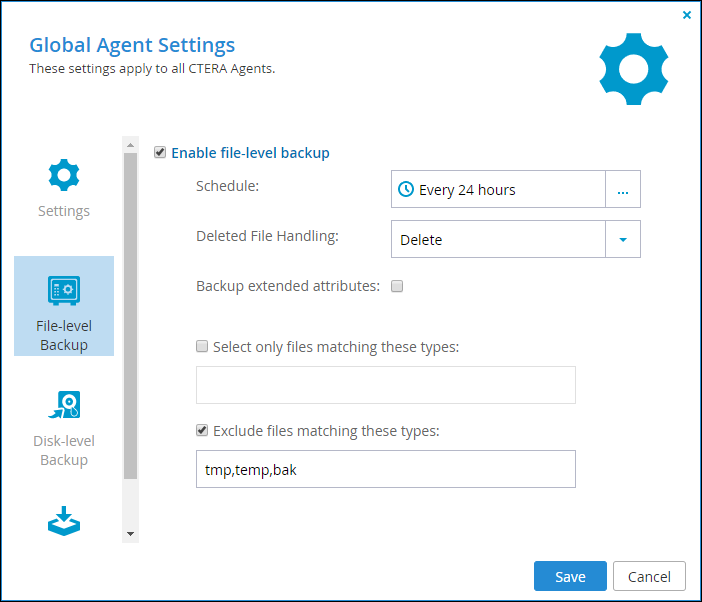
Schedule – Set a backup schedule.
a Click in the field to set the schedule.
The Schedule window is displayed.
Manual Only – Disable automatic scheduled backups. You can still back up the selected files and folders manually.
Periodically – Specify that automatic backups are performed every specified number of hours. The maximum period between periodically scheduled backups is 24 hours.
Start Every – Specify the interval between backups, in hours.
Specific Time – Specify that automatic backups are performed at a specified hour on one or more specified days.
Start Time – The hour at which backups start.
On Days – The days backups occur. Click Every Day to specify every day.
b Click OK.
Deleted File Handling – How deleted files are handled:
Move to Trash Can – Files deleted in the source folder are moved from the destination folder to the Recycle Bin, a folder named .Trash.
Keep Deleted Files – Files deleted in the source folder are kept and not deleted in the destination folder.
Delete – Files deleted in the source folder are permanently deleted from the destination folder.
Backup extended attributes – Back up special file permissions and metadata. This is supported only if the target volume is an XFS, EXT3, or, for versions prior to version 6.0.696.26, NEXT3 volume.
Select only files matching these types – Only specified file types are included in backups. The file extensions are separated by commas. For example: doc,docx,docm,dotx,dotm.
Exclude files matching these types – Specified file types are excluded from backups. The file extensions are separated by commas. For example: tmp,temp,bak.
4 Click Save.
To configure disk-level backup settings:
1 In the CONFIGURATION tab, select Local Backup > CTERA Agents in the navigation pane.
The CTERA Agents page is displayed.
2 Click Global Settings and select the Disk-level Backup option.
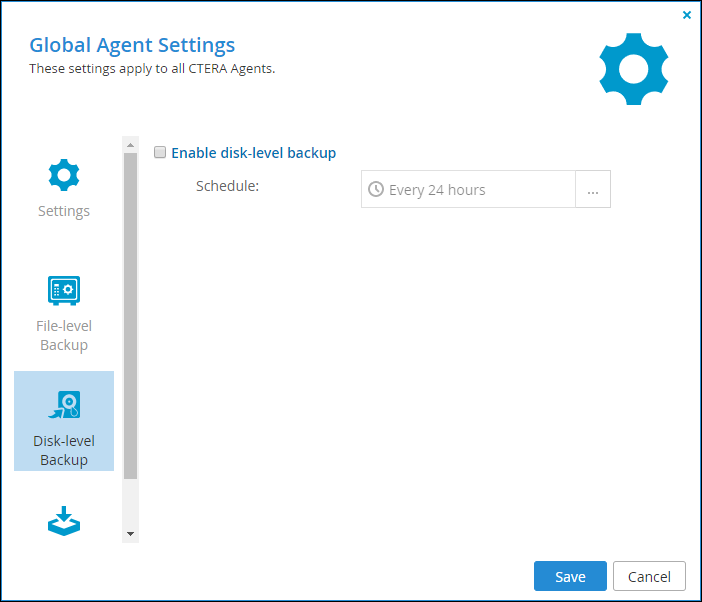
3 Change the settings as required.
Enable disk-level backup – Check to enable disk-level backup.
Schedule – Set a backup schedule.
a Click in the field to set the schedule.
The Schedule window is displayed.
Manual Only – Disable automatic scheduled backups. You can still back up the disk manually.
Periodically – Specify that automatic backups are performed every specified number of hours. The maximum period between periodically scheduled backups is 24 hours.
Start Every – Specify the interval between backups, in hours.
Specific Time – Specify that automatic backups are performed at a specified hour on one or more specified days.
Start Time – The hour at which backups start.
On Days – The days backups occur. Click Every Day to specify every day.
b Click OK.
4 Click Save.
Configuring Global Software Update Settings
You can configure connected CTERA Agents to automatically download and install software updates. The software updates are downloaded from the portal to the gateway and then the gateway distributes them to connected agents.
Note: In order to provide automatic software updates to CTERA Agents, the gateway must be connected to cloud services.
To configure disk-level backup settings:
1 In the CONFIGURATION tab, select Local Backup > CTERA Agents in the navigation pane.
The CTERA Agents page is displayed.
2 Click Global Settings and select the Software Updates option.
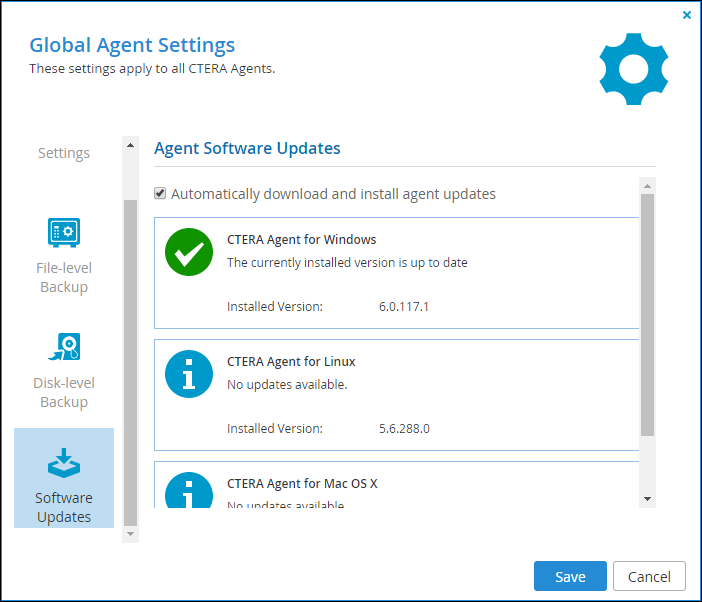
3 Select Automatically download and install agent updates.
4 Click Save.